Classic Homemade Chocolate Chip Cookies Recipe
Classic Homemade Chocolate Chip Cookies Recipe
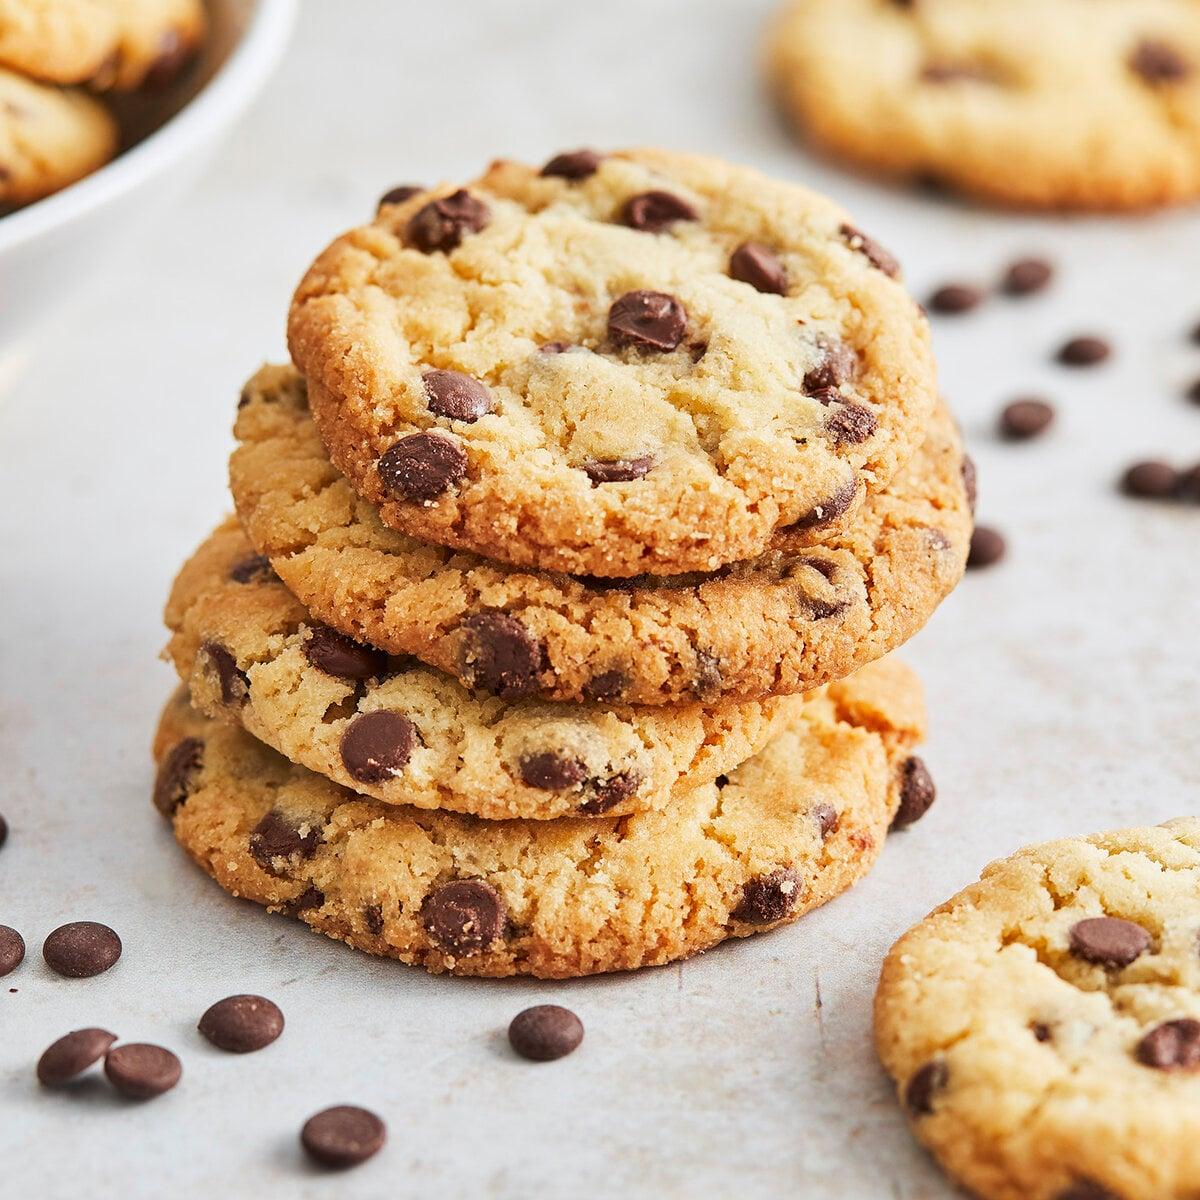
Chocolate chip cookies are among the most beloved desserts in the world. Their combination of a crispy golden exterior and a soft, chewy center makes them perfect for any occasion. Whether you are baking for your family, friends, a party, or simply treating yourself, this recipe will help you create delicious cookies that taste just like those from a professional bakery.
This detailed guide will walk you through every step of the process, from preparing the ingredients to storing the finished cookies. By following these instructions carefully, you can achieve perfectly baked chocolate chip cookies every time.
Introduction
Cookies have been a favorite dessert for generations. Their simplicity, versatility, and comforting flavor make them one of the most popular homemade treats. Chocolate chip cookies, in particular, became famous because of their rich buttery flavor combined with melted chocolate pieces.
The key to making exceptional cookies lies in balancing the ingredients correctly. Too much flour can make cookies dry, while too much butter can cause them to spread excessively. Understanding the purpose of each ingredient will help you produce the ideal texture and flavor.
This recipe is designed to create cookies that are soft and chewy in the center while maintaining slightly crisp edges. The result is a cookie that is flavorful, rich, and satisfying.

Ingredients
Dry Ingredients
- 2 ½ cups (300 grams) all-purpose flour
- 1 teaspoon baking soda
- ½ teaspoon baking powder
- ½ teaspoon salt
Wet Ingredients
- ¾ cup (170 grams) unsalted butter, melted and cooled slightly
- ¾ cup (150 grams) granulated sugar
- ¾ cup (150 grams) brown sugar
- 2 large eggs
- 1 teaspoon vanilla extract
Mix-Ins
- 2 cups (300 grams) chocolate chips or chopped chocolate
- Optional: 1 cup chopped walnuts, pecans, or almonds
Equipment Needed
To prepare these cookies, you will need:
- A large mixing bowl
- A medium mixing bowl
- A whisk
- A wooden spoon or silicone spatula
- Measuring cups and spoons
- Baking sheets
- Parchment paper
- Cooling rack
Having all your equipment ready before starting will make the baking process much smoother and more enjoyable.
Step 1: Preparing Your Ingredients
Before mixing anything, measure all ingredients accurately. Baking is a science, and precise measurements play a major role in achieving consistent results.
Allow the eggs to reach room temperature. Room-temperature eggs blend more easily into the batter and help create a smoother dough.
If you are using a chocolate bar instead of chocolate chips, chop it into chunks of different sizes. The variety of sizes creates pockets of melted chocolate throughout the cookies, making every bite unique and delicious.
Step 2: Mixing the Butter and Sugars
Place the melted butter in a large bowl. Add both the granulated sugar and brown sugar.
Whisk the mixture for about 2 to 3 minutes until it becomes smooth and well combined. The brown sugar contributes moisture and chewiness, while the granulated sugar helps create crisp edges.
This stage is important because it helps dissolve some of the sugar and creates the foundation for the cookie’s texture.
Step 3: Adding Eggs and Vanilla
Crack the eggs into the bowl one at a time, mixing thoroughly after each addition.
Add the vanilla extract and continue mixing until everything is fully incorporated.
The mixture should appear glossy and smooth. Vanilla enhances the overall flavor and complements the sweetness of the chocolate.
At this point, your batter should have a rich aroma and a silky consistency.

Step 4: Combining the Dry Ingredients
In a separate bowl, whisk together:
- Flour
- Baking soda
- Baking powder
- Salt
Mixing the dry ingredients separately ensures that the leavening agents are distributed evenly throughout the dough.
Gradually add the dry mixture to the wet ingredients.
Use a spatula or wooden spoon to fold everything together gently. Avoid overmixing, as excessive mixing develops gluten in the flour, which can make the cookies tough instead of tender.
Stop mixing as soon as no visible flour remains.
Step 5: Adding the Chocolate
Pour the chocolate chips or chocolate chunks into the dough.
Fold them in carefully until evenly distributed.
If you are using nuts, add them at this stage as well.
The dough should now be thick, rich, and packed with chocolate.
Many professional bakers recommend reserving a handful of chocolate chips to press onto the tops of the cookies before baking. This creates a beautiful bakery-style appearance.
Step 6: Chilling the Dough
Although this step is optional, it is highly recommended.
Cover the bowl and place the dough in the refrigerator for at least 30 minutes. For even better results, chill it for 1 to 2 hours.
Chilling the dough provides several benefits:
- Enhances flavor development
- Prevents excessive spreading
- Creates a thicker cookie
- Improves texture
- Produces a richer taste
Many bakeries chill their dough overnight because the flavors become even more pronounced.
Step 7: Preparing for Baking
Preheat your oven to 350°F (180°C).
Line your baking sheets with parchment paper.
Using a cookie scoop or large spoon, portion the dough into equal-sized balls.
Place the dough balls on the baking sheet, leaving enough space between them since they will spread while baking.
For extra visual appeal, press a few chocolate chips onto the tops of each dough ball.
Step 8: Baking the Cookies
Place the baking sheet in the preheated oven.
Bake for approximately 10 to 14 minutes, depending on the size of the cookies.
The edges should appear lightly golden brown, while the centers may still look slightly underbaked.
Do not wait until the entire cookie looks fully baked. The cookies continue cooking from residual heat after being removed from the oven.
This is one of the most important secrets to achieving soft and chewy cookies.
Step 9: Cooling
Remove the baking sheet from the oven.
Allow the cookies to rest on the baking sheet for about 5 minutes.
Then transfer them to a cooling rack.
During this time, the cookies will firm up slightly while maintaining their soft centers.
The aroma filling your kitchen at this stage is one of the best parts of baking.
Common Mistakes to Avoid
Using Too Much Flour
Always measure flour carefully. Too much flour can result in dry, dense cookies.
Overbaking
Even one or two extra minutes can make a noticeable difference. Remove the cookies when the centers still look slightly soft.
Skipping Salt
Salt balances sweetness and enhances flavor. Even sweet desserts need a small amount of salt.
Overmixing the Dough
Excessive mixing develops gluten, which can create tough cookies.
Not Preheating the Oven
A properly preheated oven ensures even baking and consistent results.
Variations
Double Chocolate Cookies
Replace ¼ cup of flour with cocoa powder for a rich chocolate flavor.
Nutty Chocolate Chip Cookies
Add chopped walnuts or pecans for crunch and depth.
White Chocolate Cookies
Substitute white chocolate chips for traditional chocolate chips.
Oatmeal Chocolate Chip Cookies
Replace part of the flour with rolled oats for a heartier texture.
Caramel Stuffed Cookies
Place a soft caramel candy in the center of each dough ball before baking.
Storage Instructions
Store completely cooled cookies in an airtight container at room temperature.
They will remain fresh for approximately 5 to 7 days.
To maintain softness, place a slice of bread inside the container. The cookies absorb moisture from the bread and stay softer longer.

Freezing Instructions
Cookie dough freezes extremely well.
Simply scoop the dough into individual portions and place them on a tray.
Freeze until solid, then transfer them to a freezer-safe bag.
Frozen cookie dough can be stored for up to three months.
When ready to bake, place the frozen dough directly onto a baking sheet and add 2 to 3 minutes to the baking time.
Serving Suggestions
Chocolate chip cookies pair wonderfully with:
- Cold milk
- Coffee
- Hot chocolate
- Tea
- Vanilla ice cream
For a special dessert, sandwich a scoop of vanilla ice cream between two cookies to create an ice cream cookie sandwich.
Conclusion
Making homemade chocolate chip cookies is both enjoyable and rewarding. With simple ingredients, careful preparation, and attention to detail, you can create bakery-quality cookies in your own kitchen. The combination of buttery dough, rich chocolate, and a perfectly balanced texture makes these cookies a timeless favorite.
Whether you are baking for a celebration, sharing with friends, or simply enjoying a quiet afternoon treat, this recipe provides everything you need for delicious results. With practice, you can customize the recipe to match your personal preferences and create your own signature version of the classic chocolate chip cookie. Enjoy every bite! 🍪